This morning I tried to set up the custom CSS for working inside the HTML Editor provided with Dotnetnuke version 6.2 and I found a combination of different problems with getting this to work properly.
After searching Google extensively and following many of the hints provided by different people I found that there is a problem that seems to be inherent in the later versions of Dotnetnuke when trying to get these custom CSS settings to work.
This is how I finally overcame the problem.
When trying to set up custom CSS inside of the HTML editor you need to make sure that you have your edit skin setting under the Admin Settings tab set to the skin which you wish to use for editing. This is the skin you will need to add some css to using the skin.css file. You also need to have a copy of your css in both the skin.css and the editor.css files. It appears at this stage to be a quirk of Dotnetnuke 6.
For instance if you use a custom skin as the default page skin for a page than you need to add the CSS code that you create for the HTML editor into that skin CSS file.
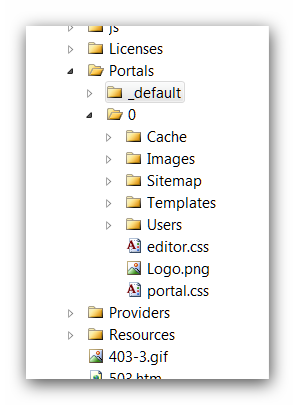
Also you will need to create a editor.css file and copy that into the portal root directory of your website. For example if you only have one website would choose to place your editor.css file into the /portals/0 directory.
These are the steps that I carried out.
Step one.
Access your website via remote logon or FTP and create an editor.css file in the portal root folder of your website either by copying the file from the /portals/_default/skins/DarkKnight/editor.css or creating your own.
It is important to note here if you are using the default DarkKnight skin you will need to add a copy of any css you create to the skin.css file for the DarkKnight skin as well as creating a editor.css file in /portals/0.
You should now have:
/portals/0/editor.css
Step two.
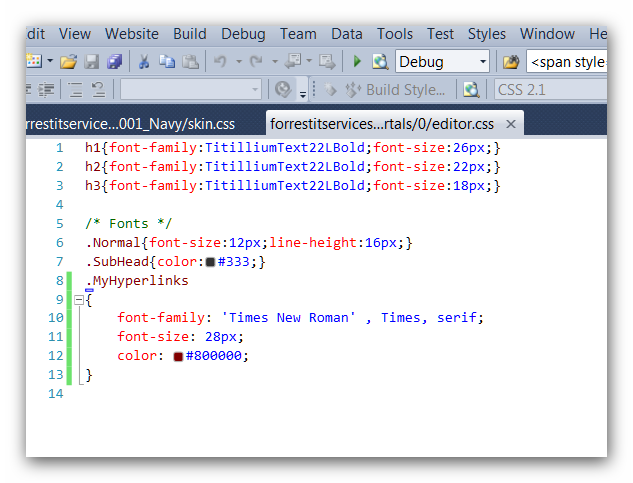
Add some code like this to the editor.CSS file that you have created. For example:
/** Html Editor CSS **/
.MyHyperlinks
{
font-family: 'Times New Roman' , Times, serif;
font-size: 18px;
color: #800000;
}
save the file.
Step three.
Add the same code to the skin.css file for the particular skin you are using for that page.
For example:
.MyHyperlinks
{
font-family: 'Times New Roman' , Times, serif;
font-size: 18px;
color: #800000;
}
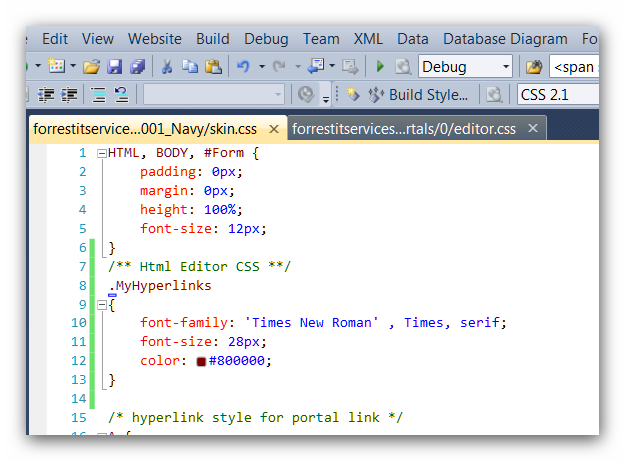
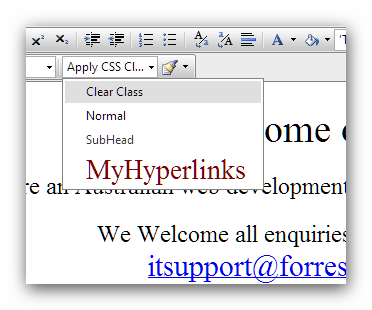
Note. When creating your custom CSS be sure to add the period "." before the name of your element. I have noticed that if you do not include the period "." before your element name it does not show up in the drop-down box in the HTML editor.
Step four.
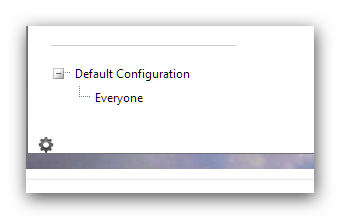
Return to your website and choose Host from the Dotnetnuke Control Panel and select HTML Editor Manager.
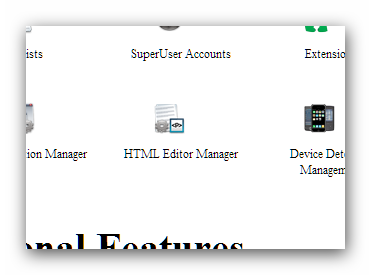 Now select the HTML manager that you want to configure.
For Example choose "Everyone"
Step five.
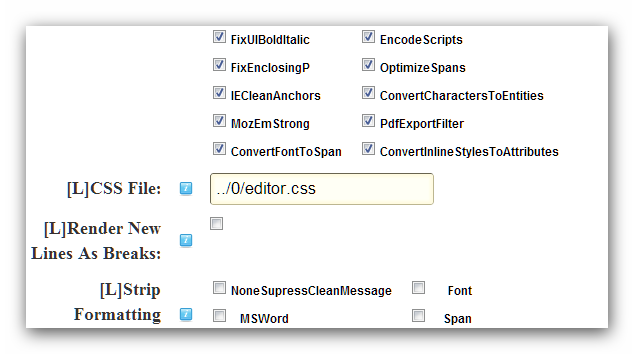
On the HTML editor setting screen add the following to the under the CSS field.
Add this setting to point to the editor.css file in the root directory.
../0/editor.css
Save the settings and return to the page you wish to edit.
Step six.
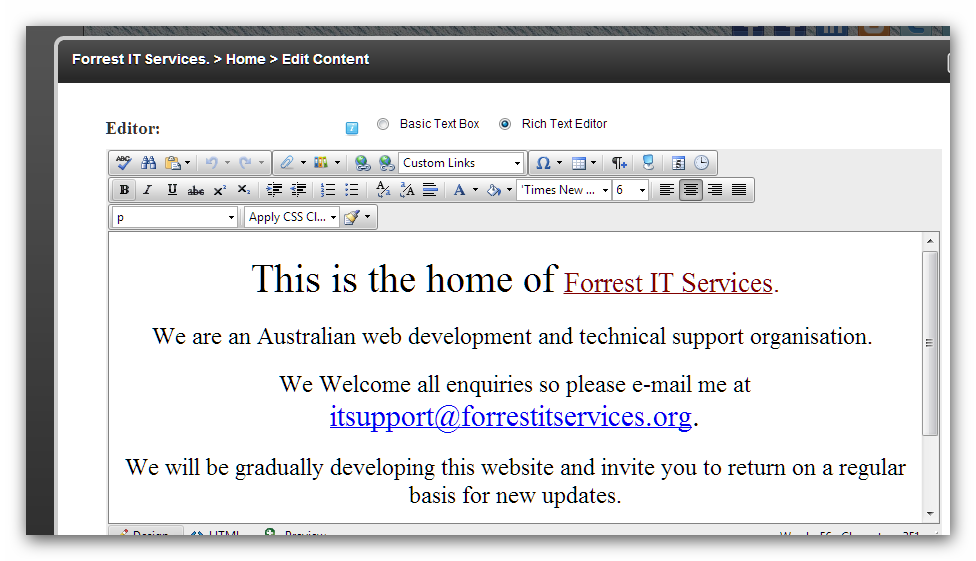
Now when you go to edit using the HTML editor your custom CSS should now display under the CSS selector.
And that should be it. I hope you find this hint helpful.
Trevor